Party Piggies with Meg

Crafting with the Party Piggies stamp set is guaranteed to bring a smile to your face! If you are having a "meh" kind of day, you need this stamp set in your life!
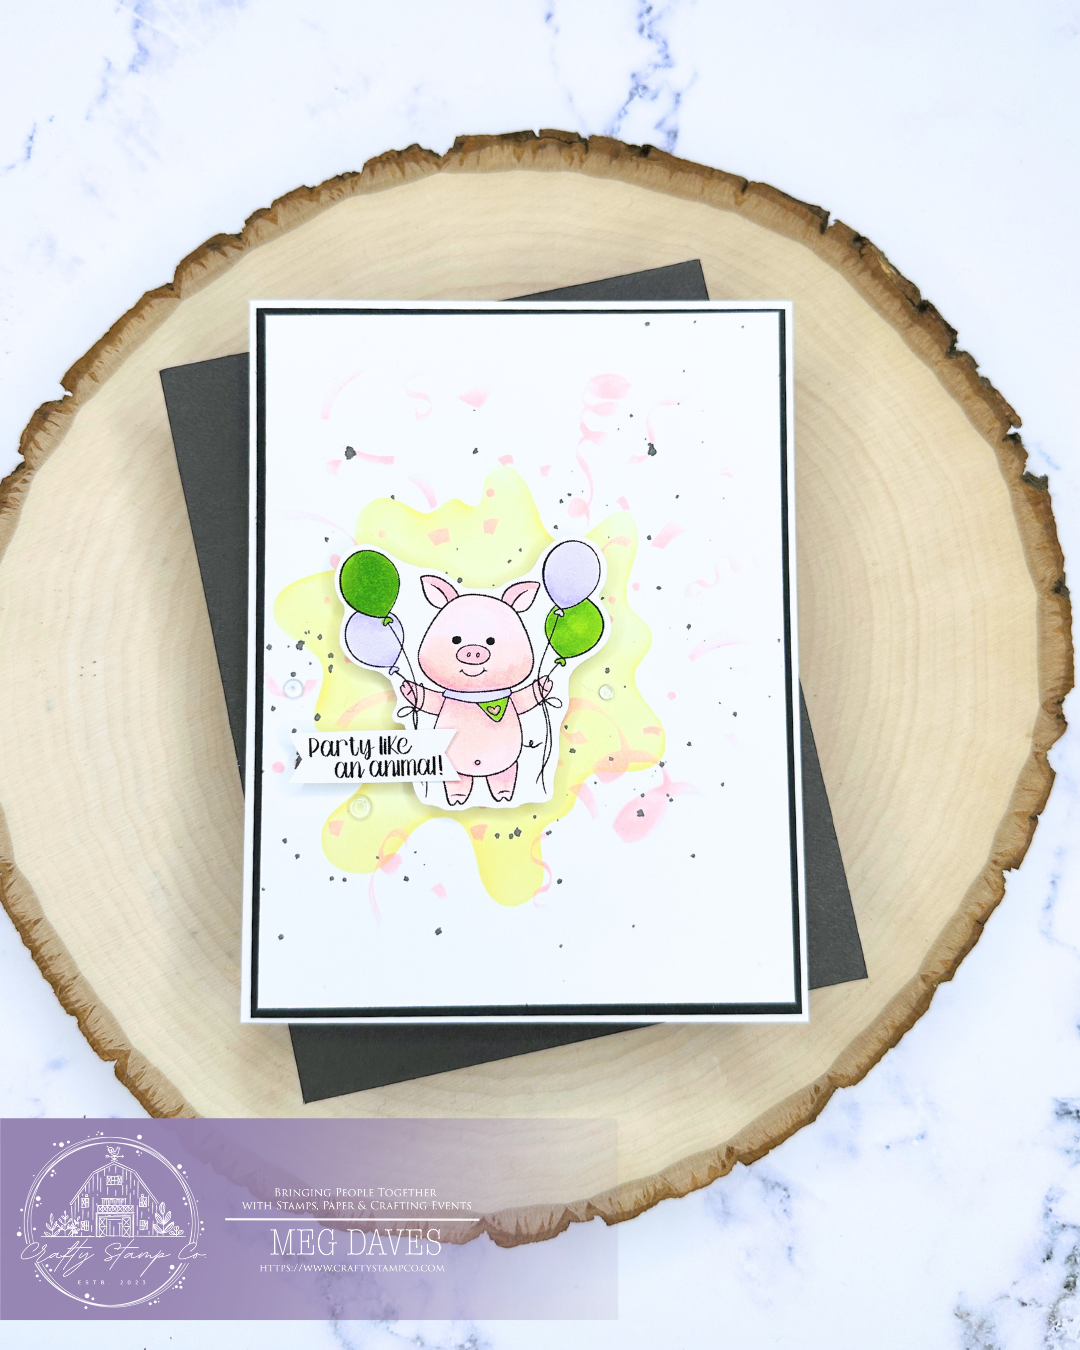
This delightful pig is cute enough on his own, but add some stencils and BAM - you have a party pig!!
To make this card, you want to start by using two stencils that will layer well together.
Choose your color palette and let's get this party started!

I started with the Ink Splats #2 stencil with some light yellow ink as my base. Use a blending brush or dauber to get that good and covered on your card. Remember you can always add more color, so a light coat to start is always best.
I chose the Confetti Popper stencil to put on top. I didn't use the entire stencil on the layer of white card stock. I picked my center point on my Ink Splat and worked out from there. I love the color pink I chose for this, it matches my pig perfectly!
To me, it needed a bit more of a color pop since the yellow and pink were pretty soft colors, so I added some black ink spots on top and loved that look.

When it comes to coloring, you can choose any type of medium that you like. I went with my beloved OLO Markers and they didn't disappoint!
To cut this image out, you can hand cut it like I did, or you can be all fancy and use the SVG files that Cristena gives you if you have an e-cutter.
Finish your card with your sentiment and some dew drops if you like and in no time, you have a birthday card with a Party Piggie!!!
Crafty Stamp Co. Supplies
Party Piggies 4x6 clear stamp set
Confetti Popper 6x6 stencil
Happy Crafting!
Meg